Live Action vs. Animation: Finding the Smart Fit for Your MDF Campaign
Video content can hook viewers, amplify your message, and distinguish your brand from the competition. However, the best medium for your message can...
▶ Video Strategy & Discovery
A video marketing strategy will keep your production cohesive and on schedule.
▶ Creative Treatments, Scripts & Storyboards
Bring your vision to life with professional scriptwriting and storyboarding services.
▶ Production Preparation
Prepare for your corporate video with professional video production services.
▶ Full Service Filming Days
Discover how Charter & Co can help you bring your vision to life through expert on-set filming services.
▶ Video Editing, Color Grading & Sound Design
Elevate your video marketing with Charter & Co’s expert video editing and post-production services.
▶ Motion Graphics
Captivate audiences with videos, ads, and social media that include high-quality animations.
▶ Licensed Music & Voiceovers
Elevate your videos with high-quality music licensing and voiceover services.
▶ Distribution Strategy & Advertising Support
Get your content noticed with a comprehensive video distribution strategy.
▶ Everything Video Marketing
Video marketing resources: What it is, why it matters, and how to do it.
▶ Everything Video Production
Your ultimate guide to video production resources: Tips and tricks for creating masterful videos.
▶ Blog
Helpful Blog resources for all of your video production and marketing needs.

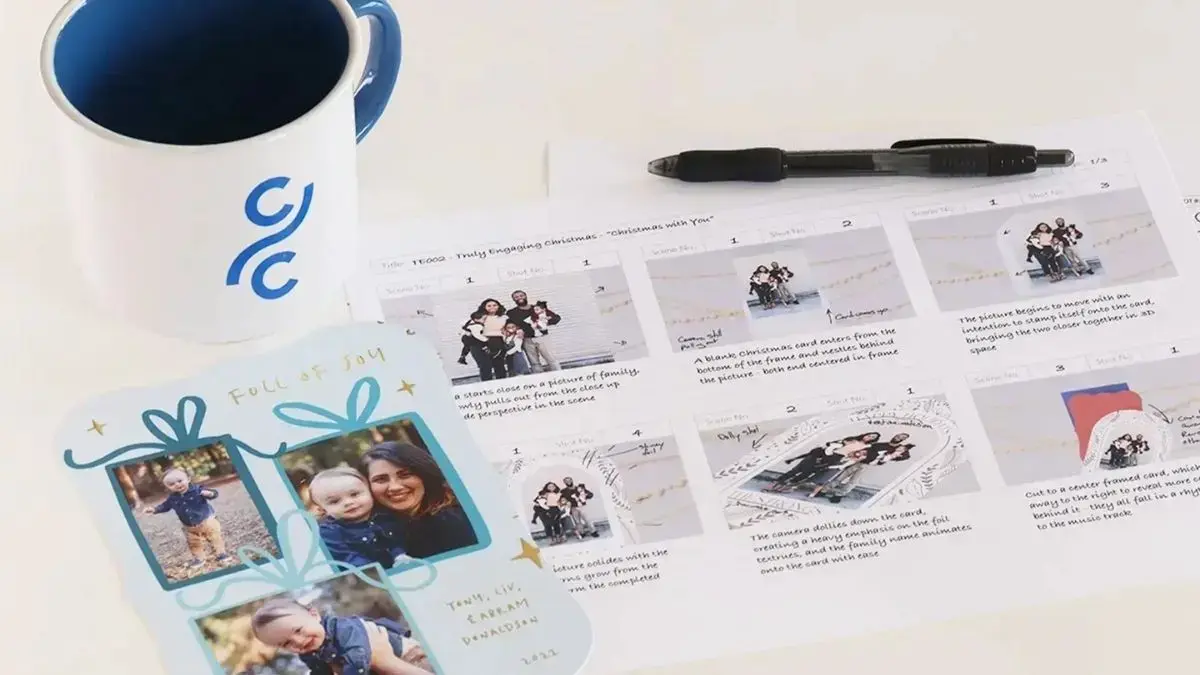
Across every branch of the film and video industry, from blockbuster motion pictures to video marketing, creating storyboards is an important step that leads to better final products.
Storyboards are visual representations of everything that you see on the screen in a finished video. They use a combination of images and words to describe the events of a video in sequential order. A successful storyboard brings everyone involved in a video production onto the same page and gives them a comprehensive understanding of everything they'll need to bring the video to life. More than that, storyboards can help you flag any production challenges you might face long before they become an issue.
If you've never done it before, creating storyboards can seem like a tremendous challenge. But with an understanding of the various elements of a storyboard and each step that goes into creating one, you can craft a video storyboard that helps you flawlessly execute your project.
An outstanding storyboard is a valuable tool for creating brand videos that connect with your audience. However, a storyboard is only as effective as its individual parts. Before we dive into our step-by-step guide to storyboarding, let's discuss the various parts that make up the whole.
There are several elements that all successful storyboards have in common:
Keep in mind that storyboards are not one-size-fits-all. Some elements are essential, like panels and titles, but additional details such as props, costumes, sound effects, and special effects can improve team understanding.
There are several computer programs and other storyboard applications that can simplify the design process. Gone are the days of drawing storyboards by hand. Nowadays, people create storyboards using design tools like:
Now that you understand the various elements of a storyboard and have an idea of the resources available, it's time to go over the steps for creating compelling, creative, and effective storyboards.
Before you begin, clearly define the purpose and objectives of your project. This is a crucial step of pre-production and the creative process. Get the team together and ask questions like:
Once you've defined your goals, start developing the narrative or video script. You can’t create a storyboard without a script. The more detail in your script, the easier storyboarding becomes. Your script should outline:
Divide the script into individual scenes arranged by narrative flow. Include time, location, and transitions.
Before storyboarding, decide on structure and format. Depending on the project, you might choose:
Keep your intended aspect ratio in mind. Common ones include 4:3, 16:9, 1.85:1, 2:1, and 2.39:1.
Now it's time to start sketching your frames or panels. Each drawing should show characters, props, and settings. Represent the composition of each scene—framing, angles, and tone.
Each panel should include written descriptions of the action, dialogue, camera movements, transitions, and other relevant details. Be concise and clear so the team knows what’s expected.
Once your first draft is complete, gather feedback from collaborators or stakeholders. Implement suggestions to improve clarity and accuracy.
After revisions, finalize your storyboard. Ensure images, descriptions, and notes are clear and accurate. Once approved, share with your team.
At Charter & Co. we believe in making video production enjoyable, approachable, and accessible to growing businesses. We can help you marshal the power of video marketing to tell an extraordinary brand story and connect with your customers.
Our video production services guide you through the entire process, from crafting your initial concept to shooting and editing. Our network of top industry talent works with you to bring your brand story to life with branded video content, company culture videos, animations, and more.
Are you ready to get started? Find your video strategy today.

Video content can hook viewers, amplify your message, and distinguish your brand from the competition. However, the best medium for your message can...

Guard Against Boredom in Your Marketing Video Production Including brand video production in your corporate marketing strategy is essential to stay...

Popular internet memes regularly joke about what is and isn't considered "cinema" — but what is "cinematic video," really?